
Introduction
The Physics Practical exam is a test of your “scientific DNA.”
It accounts for 20% of your total grade and lasts 1 hour 50 minutes. This means that Physics Practical is a determinant on whether you score an A or B for O level Physics.
You are typically assessed in two sections:
- Section A: Two shorter experiments (approx. 30–35 minutes each)
- Section B: One long experiment (approx. 55 minutes) that includes a heavy emphasis on data tabulation, graphing, and a Planning Question.
For the physics practical, students are placed under a “Shift system”.
This means that you will either start with Section A or Section B, and at the halfway mark (55 minutes), the students will rotate between the 55 minutes.
This means that you will have 55 minutes for each section, thus you have limited time with specific sets of apparatus.
Therefore, efficiency and organization are your best friends.
But before you go on reading… You might want to download a pdf copy of this article as it is quite long!
Click the ‘Download’ button, enter your email, and the pdf file will be delivered to your inbox! (Remember to check spam!)
How to Use This Guide
To maximize your performance, use this guide as a structured revision checklist alongside your practical practice sessions.
Start by familiarizing yourself with the experimental instruments and the precision of the instruments. This is to ensure every raw measurement you record during an experiment is technically accurate, as this forms the foundation of your accuracy marks.
When practicing Section B, refer to the “5-Step” Planning Template to draft responses for the experimental design questions ensuring you identify variables and procedures with specific detail.
Additionally, use the Common Errors and Their Fixessection to critique your own lab work. For instance, if you are conducting a thermal experiment, check if you have accounted for environmental heat transfer in your evaluation.
By cross-referencing your trial results with the Data Presentation & Tabulation for tables and graphs, you will transform this guide from a theoretical document into a practical tool for securing a distinction.
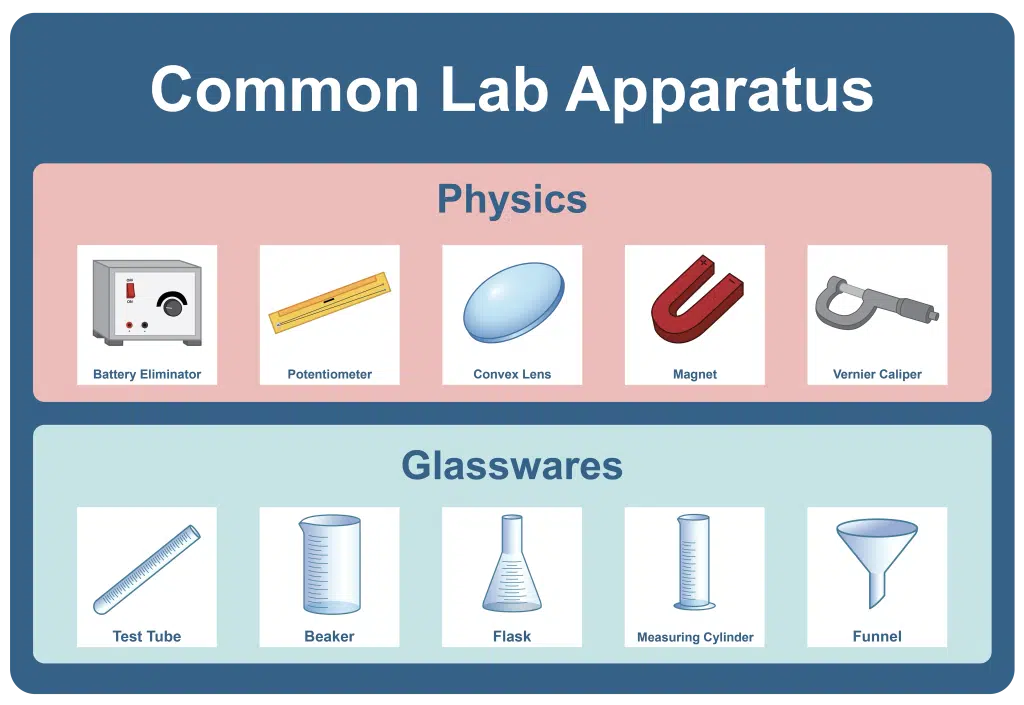
Apparatus, Measurements and Precision
At the start of the practical, students will be asked to double check their apparatus. Moreover, the lab manual will also involve students identifying apparatuses. This means that when taking O Level Physics Practical, you will need to first familiarize yourself with the apparatus in the laboratory. To do so, you can refer to the diagram below.

One of the greatest fatalities for students in O Level Physics Practical is the measurement and precision of their units. The wrong number of decimals or significant figures could easily cost you your A grade in O Level Physics Practical.
In Physics, a general rule of thumb is that the precision is determined by the smallest division of the instrument you are using. An example, of the measurements is shown below, however the table below is non-exhaustive.

Data Presentation & Calculations
In Physics Practical, students are often asked to construct tables to present their data in a table. This means that you need to learn how to construct a table and it’s necessary components.
When an examiner looks at your tables, they look at these things, Structure, Layout, and Consistency.
1. Structure and Layout
Firstly, the independent variable must be at the leftmost column and the dependent variable in the subsequent columns.
Next, the table structure can be in pencil, but the data written in the table must be in ink.
Lastly, every column must also have a heading that identifies the quantity and its unit. The accepted format is “Quantity/Unit” (eg, L/cm) or “Quantity (Unit)” (eg, L(cm))
2. Consistency
During Physics Practical, you must also pay attention to the instrument used. This is because, all the recording of raw measurements must be to the exact precision of the instrument used.
Please also take notes, all values within a single column for raw data must be recorded to the same number of decimal places.
For calculations wise, the examiners usually look out for these things: Intermediate Steps, Significant Figures, Special Functions.
1. Intermediate Steps:
If the question asks for a complex value, include columns for the intermediate raw readings before the final calculated result.
2. Significant Figures (s.f.):
Calculated quantities should generally be recorded to 2 or 3 significant figures, matching the least number of s.f. in your raw data.
3. Intermediate Steps:
Trigonometric values (sin, cos, tan) should typically be recorded to 3 decimal places.
Graphs
In physics practical, graphs are often the heart of Section B, where a poorly drawn graph can easily cost you 4-5 marks. Thus, it’s important to master graph drawing for physics practical.
Here are some guidelines to follow:
1. Size
Your graph should occupy more than half the graph paper provided in both directions towards x and y axis. Try to adjust the intervals of the scales to fulfil this criteria.
2. Axes
Axes of the graph must be clearly labelled with both quantity and units.
3. Scale
Try to choose easy to read scales; eg, 1cm to 2 units, 1cm to 5 units, 1cm to 1 unit.
Awkward scales like 1:3 or 1:7 will make plotting inaccurate and difficult for you, and may cause mark deductions.
4. Plotting
Use a sharp 2B pencil to plot the graph. Points should be denoted using small “x” marks.
5. Line of best fit
Your line of best fit should be a single, thin, smooth line with a fair distribution of points above the graph, and below the graph.
Avoid point-to-point sketches of graphs no matter what!
Planning Questions
Planning questions in O Level Physics Practical is frequently known as the “Golden 5 Marks”. Students frequently lose marks here because planning questions are known to be wildcards.
But fret not! You just have to write a set of procedure that is easy for the reader to carry out, that’s all!
Again, there is always a template set of marking points that markers frequently look out for. No matter what topic, whichever experiment, as long as you’re able to fulfil all the criteria in the template, you got it!
The “5-Step” Planning Template
- Identify Variables: State clearly what the Independent Variable (the one you change), Dependent Variable (the one you measure), and Control Variable (the one you keep constant) are.
- Apparatus List: Mention specific tools like “metre rule,” “voltmeter,” or “retort stand.”
- Procedure: Write a numbered list of instructions. Use words like “Measure,” “Record,” and “Repeat.” Ensure you specify a range (e.g., “Repeat for 5 further values of ___ )
- Data Analysis: State what graph you will plot (e.g., “Plot a graph of ___ against _____”) if you intend to use a graph. Elsewise, write about how you intend to analyze the data (Tables, before after changes etc)
- Conclusion/Verification: If you drew a graph, explain how the graph shows a certain relationship and your conclusions after. Remember to always account for whether your hypothesis is correct.
Suggestion of Common Errors and Improvements
Another category of questions students often fear, is the suggestion of errors and improvements. This is commonly 2-3m in O Levels. A general rule of thumb is that you should never give answers like “I measured wrongly” as an answer. This is not a scientific error, and you will not be awarded any marks for this answer.
Here are some common errors you can use and their corresponding fixes.
| Common Errors | How to fix these errors? |
| Parallax Error | Avoid by ensuring your eye is level with the scale and perpendicular to the reading. |
| Oscillation Accuracy | Instead of timing 1 oscillation, time 20 (20T) and divide by 20 to find T. This reduces the percentage error caused by the human reaction time. |
| Thermal Heat Loss/Heat Gain | Heat gain from the surroundings and heat loss to the surroundings is commonly a substantial error. To avoid this, use a lid for the Styrofoam cup or alternatively, use more insulation when conducting the experiment. |
| Light Interference | In optics experiments, ambient light from the room could potentially affect your readings. To fix this, perform the experiment in a darkened room or alternatively, use a black cloth shield to prevent ambient light from affecting your results. |
Again, this list is non-exhaustive, but serves as to give you a general sensing of how your answers should look like.
Conclusion
Before entering the exam hall, make sure that you have sufficient stationery. This means, 2B pencils, sharpener, eraser, rulers, calculators and so on.
In the examination, pay close attention to instructions and highlight the important steps. Additionally, also double check every single value in your table for a unit. A missing unit is often a missing mark.
With hard work prior to the exam as well as precision, you will be able to score in your O Levels Physics Practical.
Success in the exam is often about precision in measurement and rigor in presentation. By following the conventions discussed in this article and mastering them, you will be able to walk into the Physics Laboratory on your examination day.
Find out more by joining us at Science of Studying!
Prepared by: Lys
A little more about ourselves…
The Science of Studying provides live online tuition via Zoom classes for Pure and Combined Chemistry, Biology, and Physics. To date, we have taught more than 800 students over 12 years.
In case you are wondering, yes – there is a science behind studying! At Science of Studying, we use our SOS system™ to teach our online science classes so that even last-minute students can see remarkable improvements in their grades – without mind-numbing memorisation of textbooks and without the drudgery of doing numerous assessment books.
The SOS system™ guides students through an effective process of:
– Understanding key concepts
– Applying the concepts through smart, targeted practice.
– Learning to avoid common ‘traps’ set by examiners
– Learning exam-smart answering techniques for each topic
– Overcoming tricky exam questions
All these conducted in a fun, interactive, stress-free online environment.
If you need help with your Chemistry and Biology subjects, do reach out to us and we will see what we can do to help.
Website: https://trial.thescienceofstudying.com/signup-da
Admin number: +65 88082348